Least Privileged access in ArgoCD

Introduction
In my last blog, I already mentioned the ArgoCD Ephemeral Access Extension briefly. I was very excited about it when I learned from it on Kubecon: I think it is a valuable tool to increase the security of a Kubernetes production cluster. The authors of the Ephemeral Access Controller wrote the GUI, it was/is up to the community to write plugins for several tools. It is the role of the GUI to allow the user to request permissions, the role of the plugin is to grant or deny the request. In this way, the same Access Extension can deal with different reasons to allow or deny the request. I wrote the plugin for ServiceNow, you can find it on my Github repository [1]. Information how to install and configure the plugin is in that repository as well. In this blog I will describe the plugin from an operator point of view.
How does it work?
When the user requests more access, the Ephemeral Access Extension will call the plugin to do the checks. The plugin should be written in go. The request comes in on the GrantAccess method, which will do the tests. When all tests pass, then the plugin can return plugin.GrantStatusGranted in the status field, to indicate that the request is granted. Likewise, plugin.GrantStatusDenied can be returned when the request is denied. When the plugin needs more time, then plugin.GrantStatusPending can be returned, the Ephemeral Access Extension will then call on GrantAccess later again to see if a new status is available. My plugin only returns GrantStatusGranted or GrantStatusDenied, to keep it simple.
When you want to get a deep dive of the Ephemeral Access Extension itself, you can read the information on the Github repository [2].
Checks on the Change Item
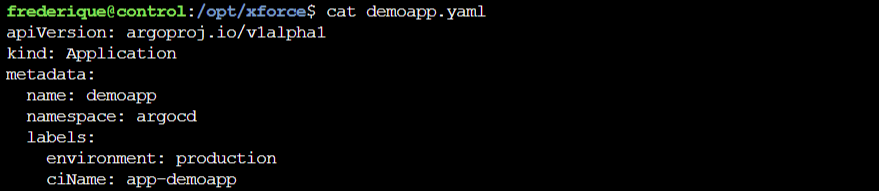
When the plugin is called, it will first look in the lables of the ArgoCD application which Configuration Item (CI) in the CMDB belongs to this application. In this example, I will use the default ciName as label key and app-demoapp as name of the CI.
The plugin will call the API of ServiceNow and get the information of the CI. Based on that, it decides if the CI is valid. There are multiple values in ServiceNow for a CI. The plugin will allow a request for a CI that has one of the following statuses:
1 = Installed
3 = In maintenance
4 = Pending install
5 = Pending repair
When the status is different, then the request is denied. It doesn’t make sense to change an application that has a state of Absent, Retired or Stolen.
The username and password for the ServiceNow API are stored in a secret in
Kubernetes, the URL of the ServiceNow API is stored in environment variables of
the controller deployment in the argocd-ephemeral-access namespace.
Checks on the changes
When the CI is valid, then the changes are retrieved. It is currently not possible to add a change number to the request from ArgoCD, this means that we have to get all changes that might be relevant to our request. This has two big disadvantates: when there are lots of changes, then the request to the ServiceNow API might become very slow. There might also be multiple valid changes, currently the plugin will take the first one that is sent by the API. This might not be the correct one, and this might impact the amount of time that one gets to do the change.
To limit the number of changes that are sent back by the API, most of the checks on the change are done by the API. For example: we only want to get back changes that are approved. The full list of checks is:
- Is the change connected to the correct and valid CI (see before)?
- Does the change have the state “Implement”?
- Does the change have the phase “Requested”?
- Is the change approved?
- Is it an “active” change?
- Does the change not start before 1 week back?
- Does the change not end after 1 week from now?
These last two checks are meant to limit the amount of changes that we get from the API and I hope that this will speed up the calls to the API in a bigger production environment.
Duration of the extra permissions
Currently, the Ephemeral Access Extension passes the duration of the permission in the Access Request to the plugin. Unfortunately there doesn’t seem to be a way to change this duration: not from the go code in the plugin, not by changing the AccessRequest in Kubernetes. This means, that by default a request is either granted for the full duration of the request (which is by default 4 hours), or it is denied. I think that it would be wise to change this and let the plugin decide the duration of the permissions. From an ITIL point of view, changes have different durations. A change can be two hours, four hours, one day - maybe even multiple days when the change is part of a very big change where the work will take a whole weekend.
The question is: how much time should the permission be granted? I raised this as an issue on the Ephemeral Access Extension github repository. The conclusion was that the plugin should be able to limit the duration, but not extend the default duration. This will be implemented in a future release of the Ephemeral Access Extension.
Up to the moment that this change is implemented, the plugin has to work around this issue. There is one (quite dirty) trick around this, and that is to delete the AccessRequest in Kubernetes. The effect is that permissions are revoked on the moment that the AccessRequest is no longer there. For the ServiceNow plugin this means that:
- When a change has an end date that is later than the duration in the original request, then the Ephemeral Access Extension will stop the permission after this duration,
- When a change has an end date that is earlier the duration in the
original request, then a Kubernetes CronJob is created that will delete the
AccessRequest. To prevent CronJobs to be kept forever, the job that is
started by the CronJob will remove the CronJob after the AccessRequest is
deleted. Unfortunately, this means that the logs are no longer present after
this. Unfortunately there doesn’t seem to be a way to start jobs only once on a
certain time. It would be nice to have such a feature (and then use
ttlSecondsAfterFinishedin that type of Job as well to clean them up automatically).
Reporting back to the operator
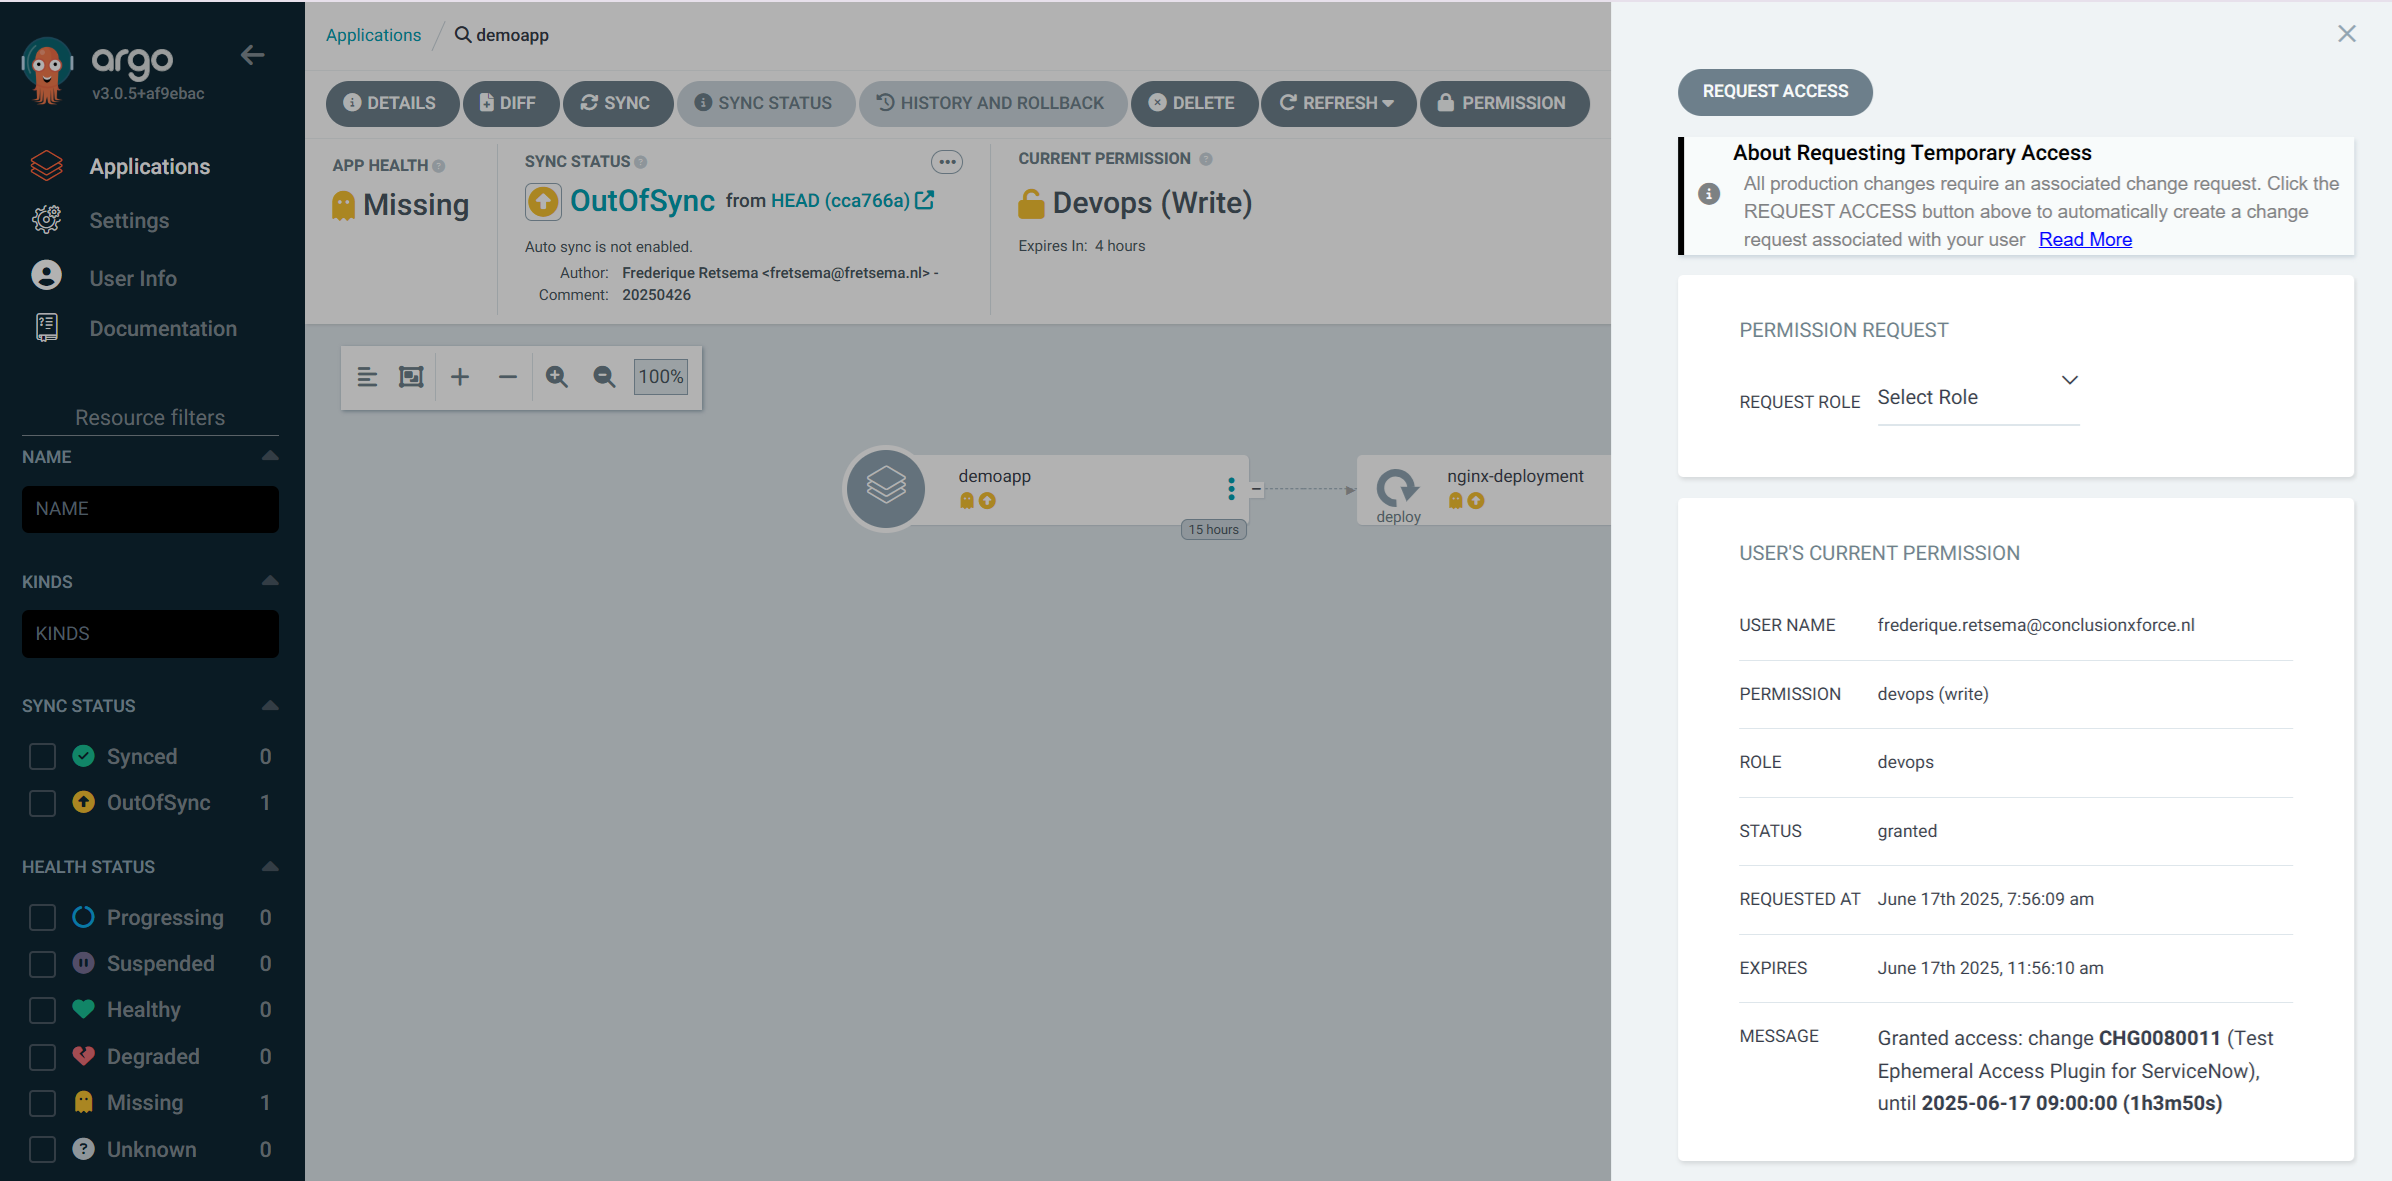
When the AccessRequest is granted, I used Markdown language to make fields like the change number and the end date and the duration bold. This is important because the difference between the date and time in the message are leading, not the time in the “Expires” field that is shown by the Ephemeral Access Extension.

Unfortunately, the Ephemeral Access Extension doesn’t give a nice message when the request is denied. One has to search in the AccessRequests within Kubernetes or in the logs of the plugin to find out why a request is denied. The people who maintain the Ephemeral Access Extension will fix this in the future by adding a history of requests, see this issue.
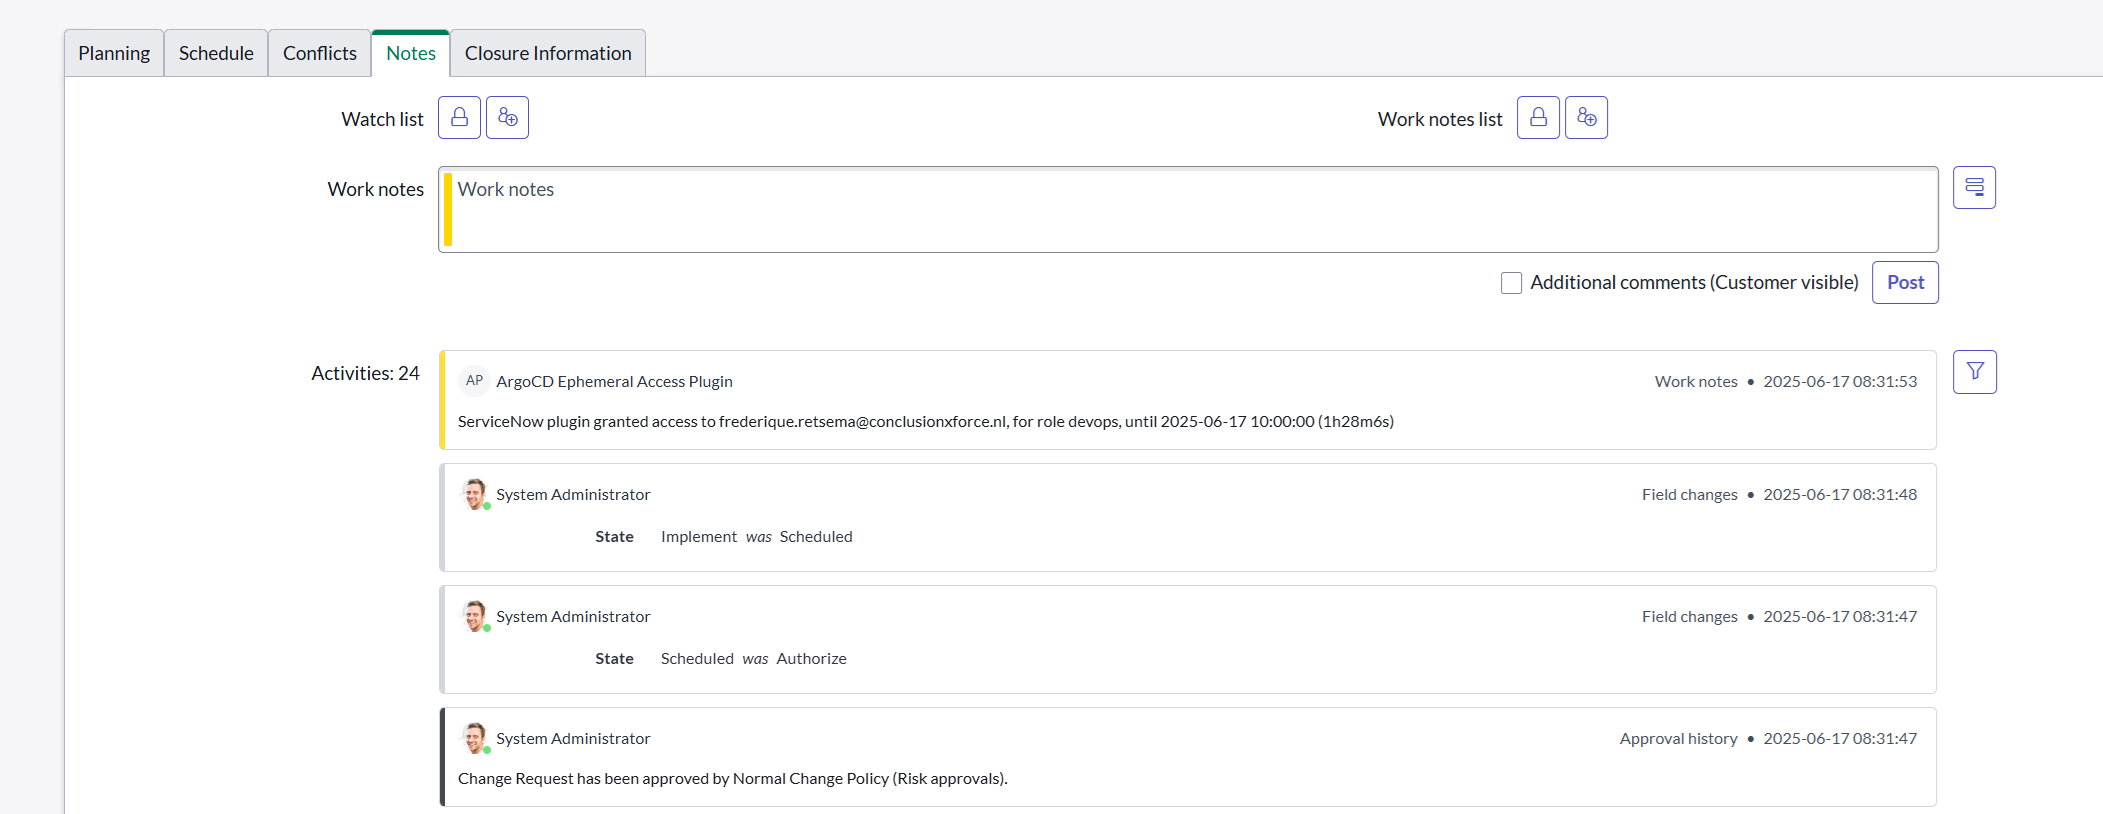
When the request is granted, the ServiceNow plugin will also write a note in the change that the request is granted. In this way, everyone who is interested in the change can see who was granted access and for how long.
Exclusion roles
I think that for many environments this functionality is enough to work on a day-by-day base. There might, however, come a day where a lot goes wrong. The day that you don’t have time to create a change, keep the duration and the statuses in ServiceNow correct etcetera. Maybe ServiceNow itself has API errors and changes cannot be checked. For these use cases, I created “Exclusion Roles”: roles of the Ephemeral Access Controller that will not look at CIs and changes, but will immediately grant access.
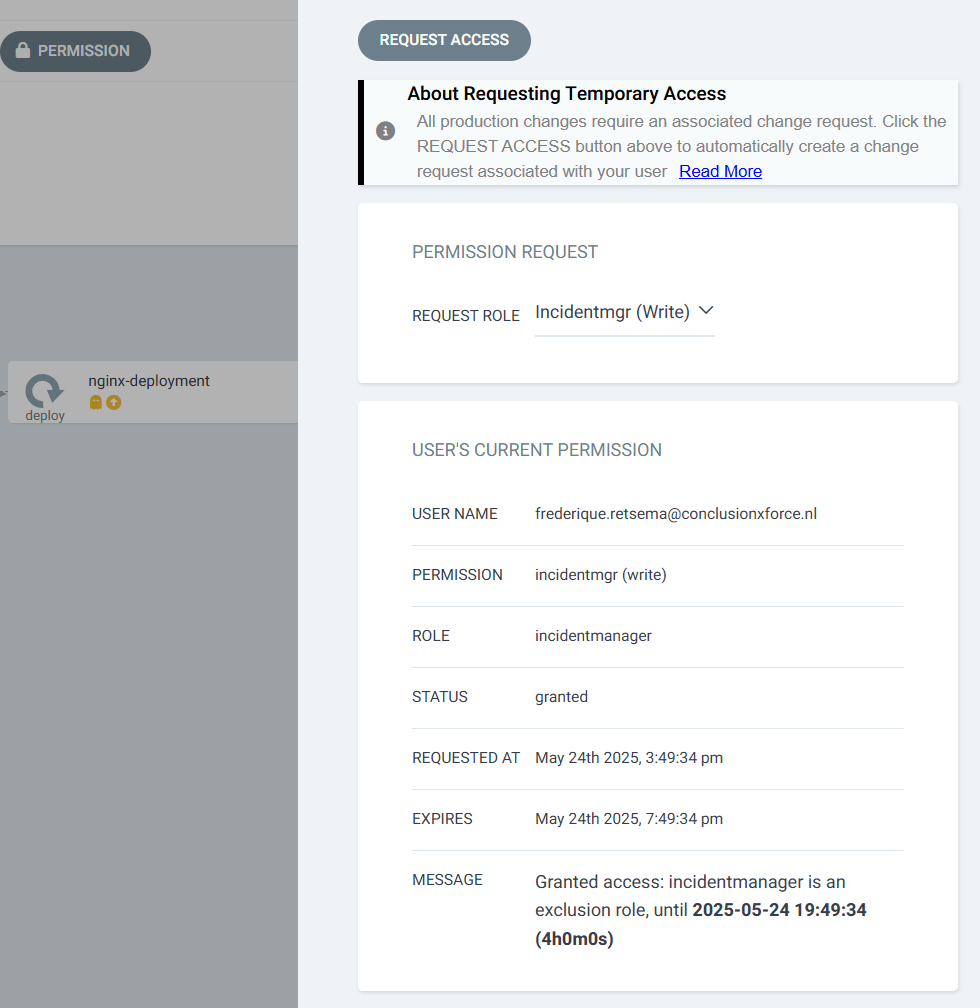
You might use this for incident managers, who coordinate an incident and add administrators to the incidentmanager group on the moment that these issues happen. Or you might have roles of “Senior Staff” that knows when to bypass Service Now, and when not to do so. It shouldn’t become a “normal way of working” to use this mechanism, the plugin will give a warning when someone gets access via an exclusion role:

when someone is granted permission based on a change, this information has INFO severity:

You can see here that the timezone on the server is different from the timezone in the UI. This isn’t an issue. It is, however, important to use the same timezone in the environment variables of the plugin and the timezone of the user in the ServiceNow environment that the plugin is using.
Changes in existing Kubernetes resources
The username and password for the ServiceNow API are stored in a secret in Kubernetes. The ClusterRole controller-role (that is created by the Ephemeral Access Extension) has to be changed to be able to read the secret. The ClusterRole should also be allowed to create CronJobs.
The controller deployment has to be changed as well: I added a lot of
environment variables, some of them use defaults. The “value at deployment”
is the value that you can find in the Github repository under
manifests > plugin > controller-patch.yaml. When you remove the environment
variable, sometimes it will use a sensible default. For other environment
variables the plugin will deny permissions when the environment variable is not
present.
| Environment variable | Value at deployment | Default value | Remarks |
|---|---|---|---|
| SECRET_NAMESPACE | argocd-ephemeral-access | argocd-ephemeral-access | |
| SERVICENOW_SECRET_NAME | CHANGE_THIS_WITH_THE_SERVICENOW_SECRET_NAME | servicenow-secret | (1) (2) |
| SERVICENOW_URL | CHANGE_THIS_TO_POINT_TO_YOUR_SERVICENOW_URL | n/a | (1) (3) |
| EXCLUSION_ROLES | incidentmanager | n/a | (4) |
| TIMEZONE | Europe/Amsterdam | UTC | (2) |
| CI_LABEL | ciName | ciName | |
| EPHEMERAL_PLUGIN_PATH | /tmp/plugin/plugin | n/a | (5) |
(1) Plugin will deny access when this value is not changed
(2) When this environment variable is removed, the value under “Default value”
is used
(3) When this environment variable is removed, the plugin will deny access
(4) When you want to use incidentmanager as an exception role, you need to
create AccessBindings and RoleTemplates for incidentmanager as well. You can
look in the cloudformation directory for a working environment in AWS for this
configuration.
(5) Don’t change this, it is part of the Ephemeral Access Extension
configuration.
How to create a ServiceNow development environment
One of the advantages of ServiceNow is that everyone can create a development environment in minutes. You need to register a developer account [3] and then you can create a ServiceNow instance, including access to all APIs. When you don’t use the ServiceNow instance for 10 days, then the instance will be deleted.
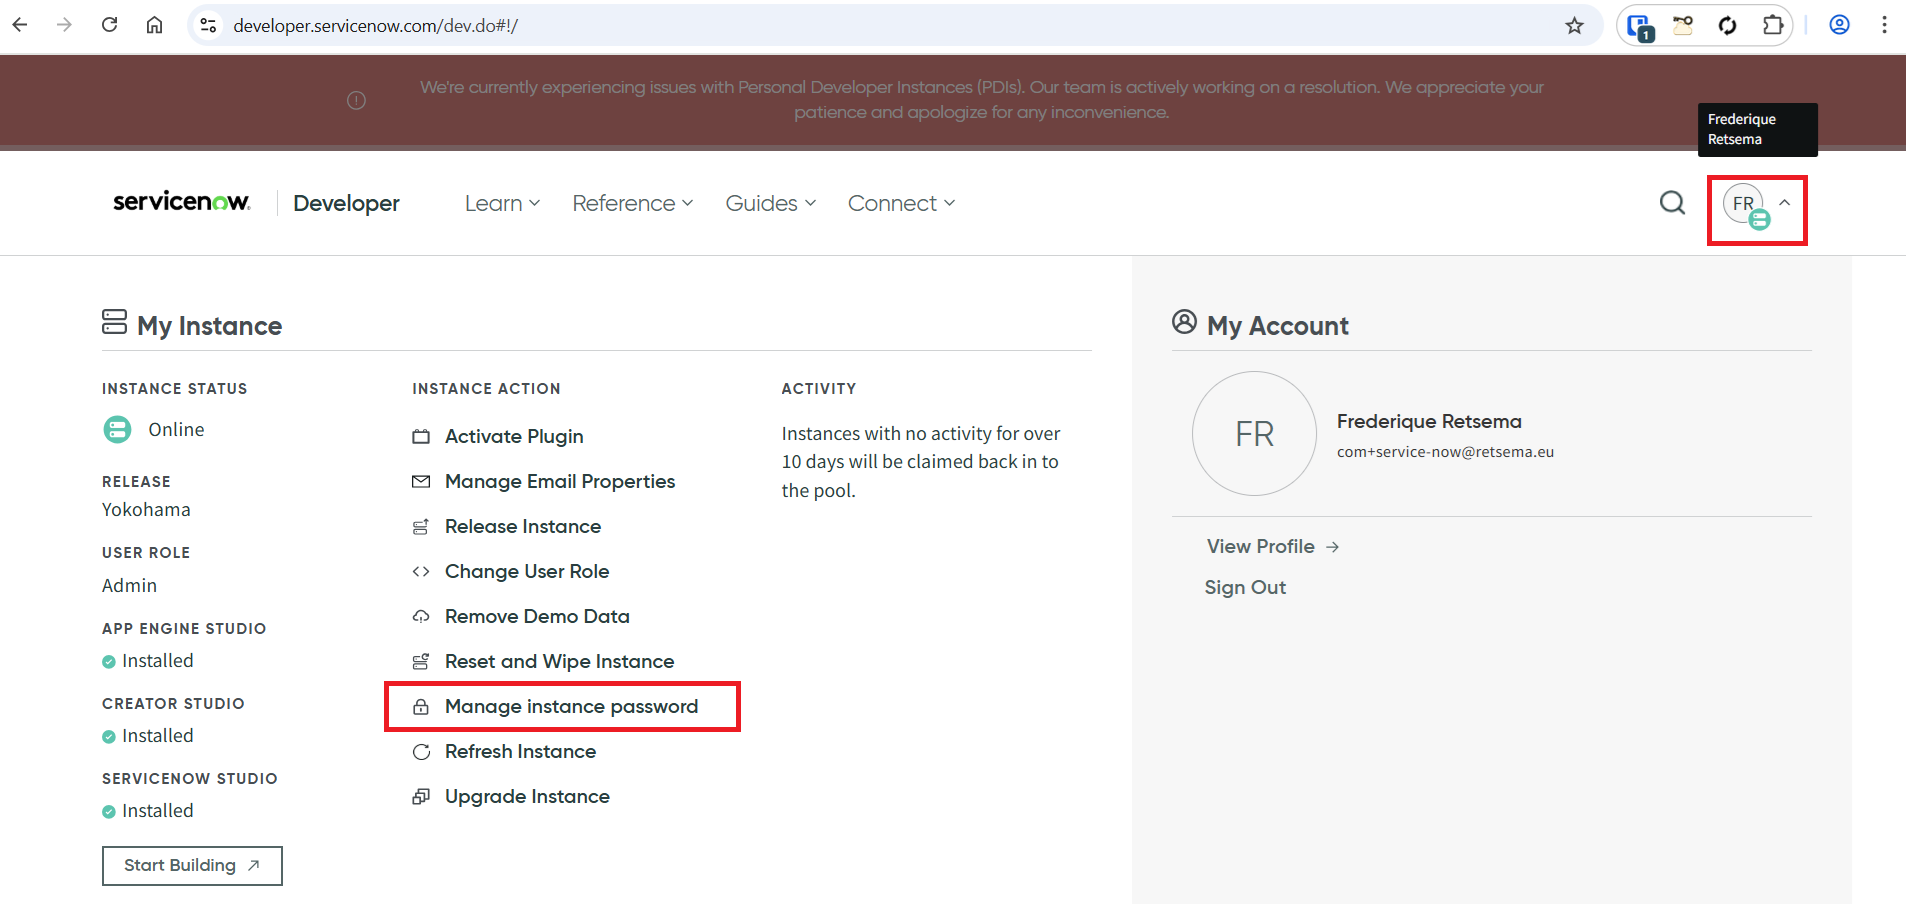
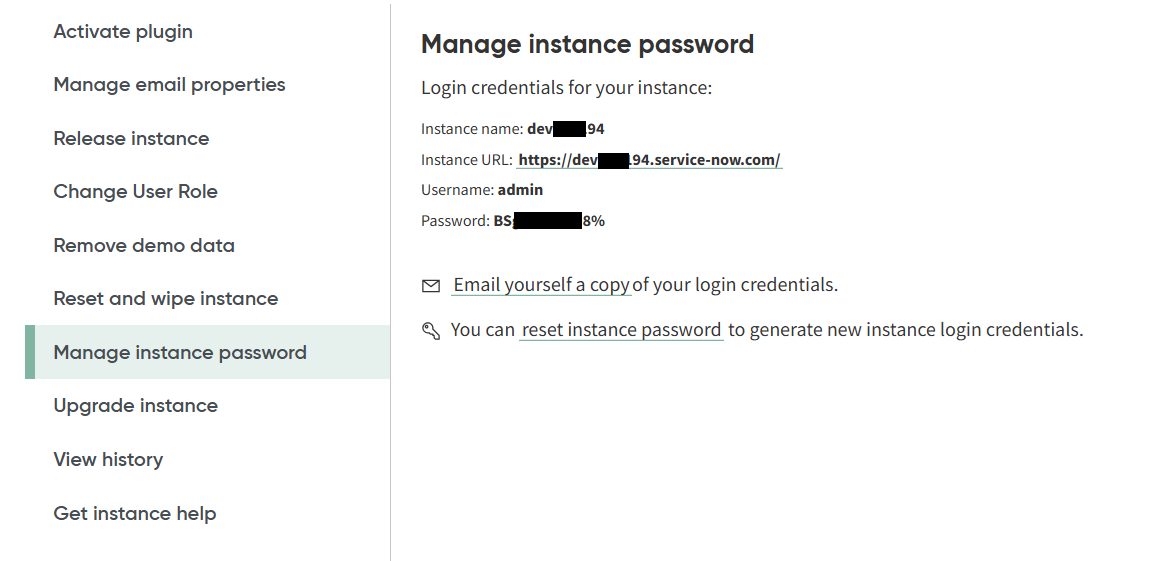
There are two ways of configuring the development environment: via a script and via the ServiceNow portal. To get the URL, the username and the password for your instance, log in to the developer platform and go to your profile (initials in the upper-right corner of the screen). Click under Instance Action on menu item “Manage instance password”:
You now have the Instance URL, that can be used both for the API and for the portal.
Via a script
Not all settings can be changed using a script. When you want to create a dedicated plugin user in ServiceNow, you still have to do this via the portal. Please mind to set the timezone of this plugin user to be the same as the environment parameter of the plugin. It is possible to use the admin user as the user for the plugin as well, which can be useful for testing the plugin.
I added two scripts to the repository: one to create a CI class with a CI, the
other one to add a change with the valid statuses. The scripts are in the
/examples/servicenow-scripts directory. Both scripts need the ServiceNow URL,
the username and the password as parameters, for example:
create-ci-class-with-ci.sh https://dev123456.service-now.com admin a%B12CdE
create-change.sh https://dev123456.service-now.com admin a%B12CdE
When you want to know more about the ideas behind the script, I will explain that in the next part about the configuration via the ServiceNow portal.
Via the ServiceNow portal
Change the timezone
First change the timezone in the console: click in the upper right corner on your account (for admin users: the image of the smiling guy), then select Profile. Change the Time zone (in my case: to Europe/Amsterdam) and click on the Update button.
Create a CI
For our solution, we need (at least) one Configuration Item (CI) and one
Change. CIs in ServiceNow are part of CI groups. We could use the already
existing group Application, but it might be better to create a new group
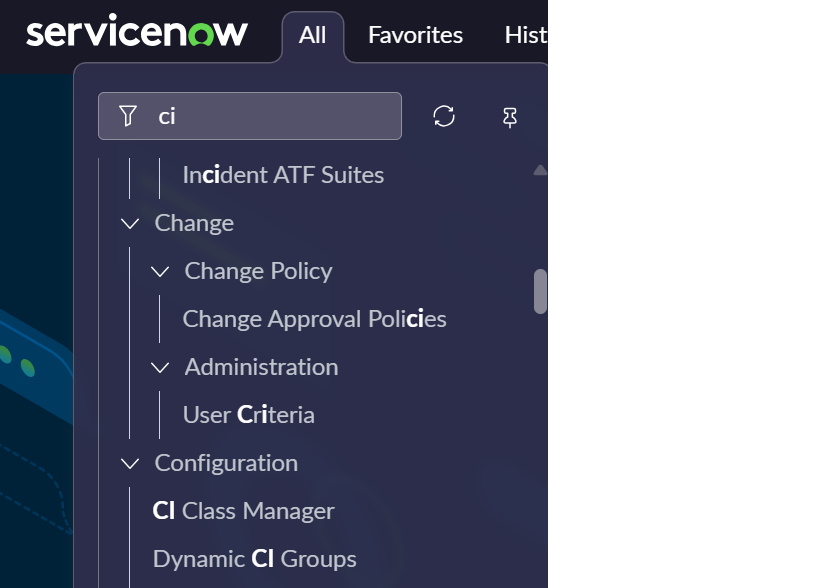
Kubernetes Application. Use the hamburger menu on the upper left and
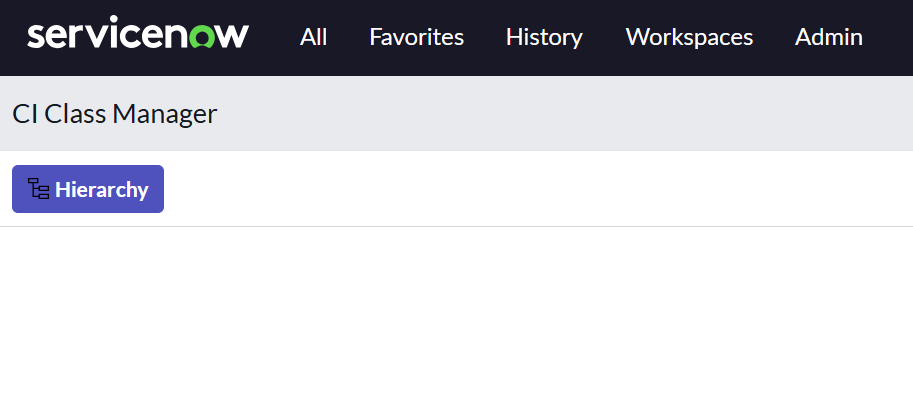
then search for CI Class Manager.
Click on the button Hierarchy.
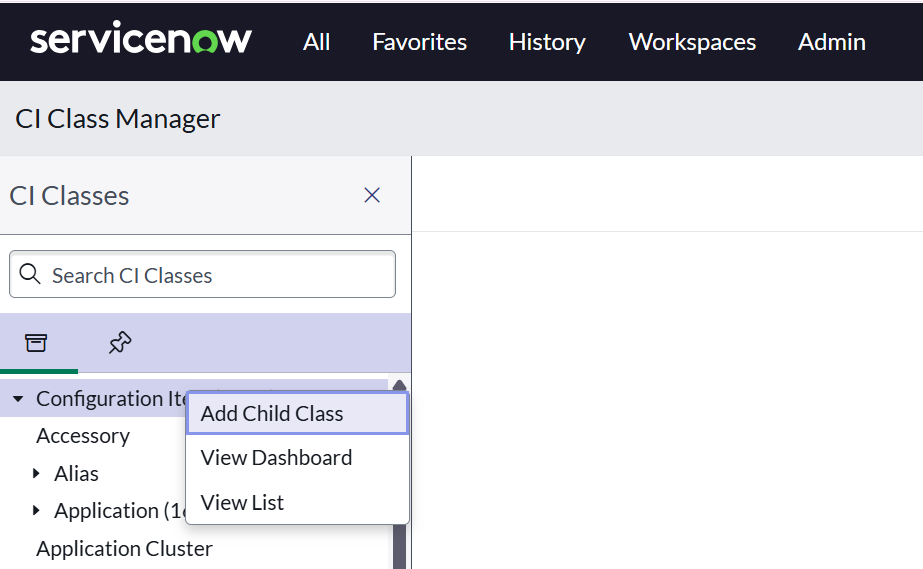
Hover over the Configuration Item item in the menu and click on the hamburger menu.
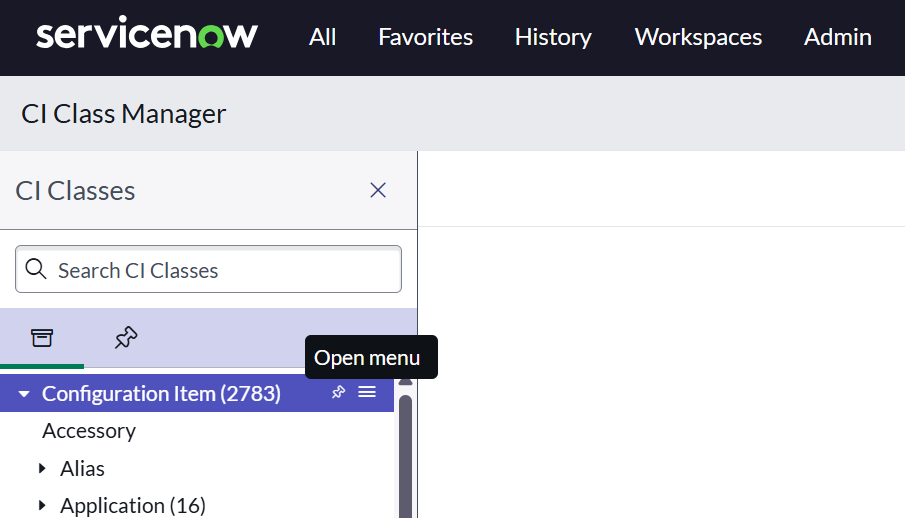
Click in the menu on Add child class.
The Display Name is mandatory and is the base for the internal table name
within ServiceNow:
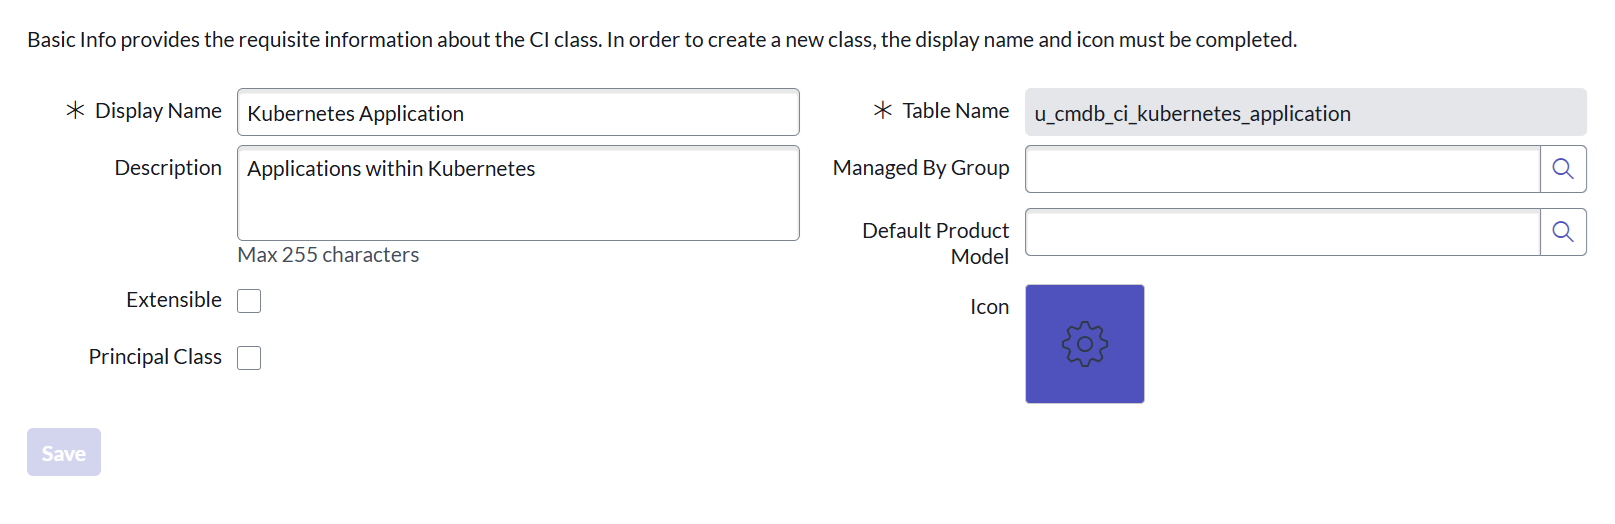
The rest of the fields are not required, click 4 times on “Next”, then “Done”.
In the left menu, click on CI List, then on New. Give your application a name, for example app-demoapp. Click then on Submit.

We now have a Kubernetes application in the correct the Installed state. You can change this if you like to see how the plugin behaves on different statuses.
Create a change
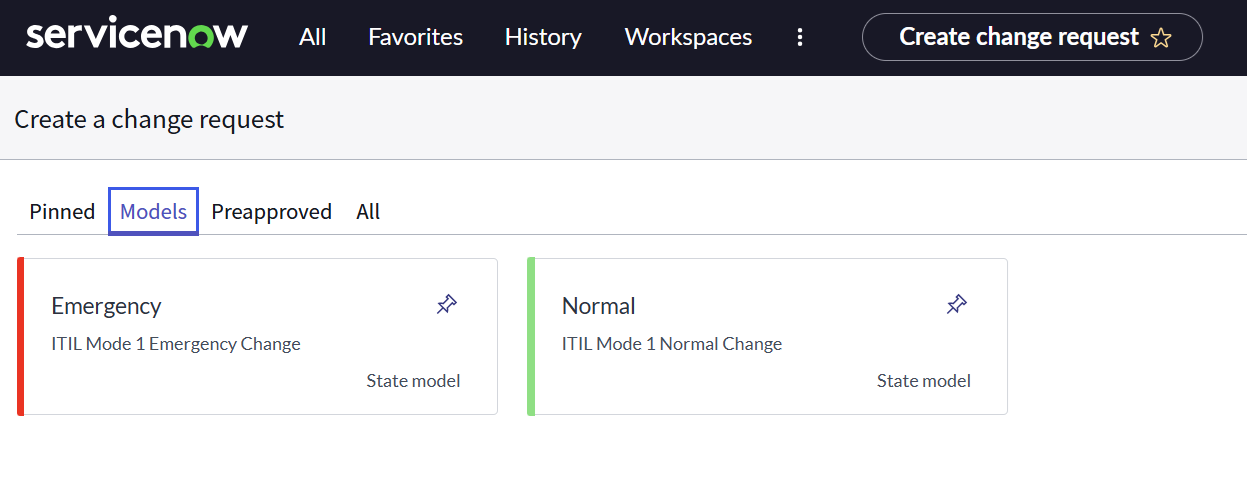
When you want to use the console to create a change, use the hamburger menu in the top menu and search for change. Select the menu item Create new. After that, select the menu option Models. You can see here the options to create an emergency change or a normal change. Select a Normal change for now.
Change the field Configuration item to app-demoapp and select tab Schedule to change the start and end date of the change. Use for example a timeframe from more-or-less now to a few hours later. Click on Submit after that, and go in the main hamburger menu to Change > Open.
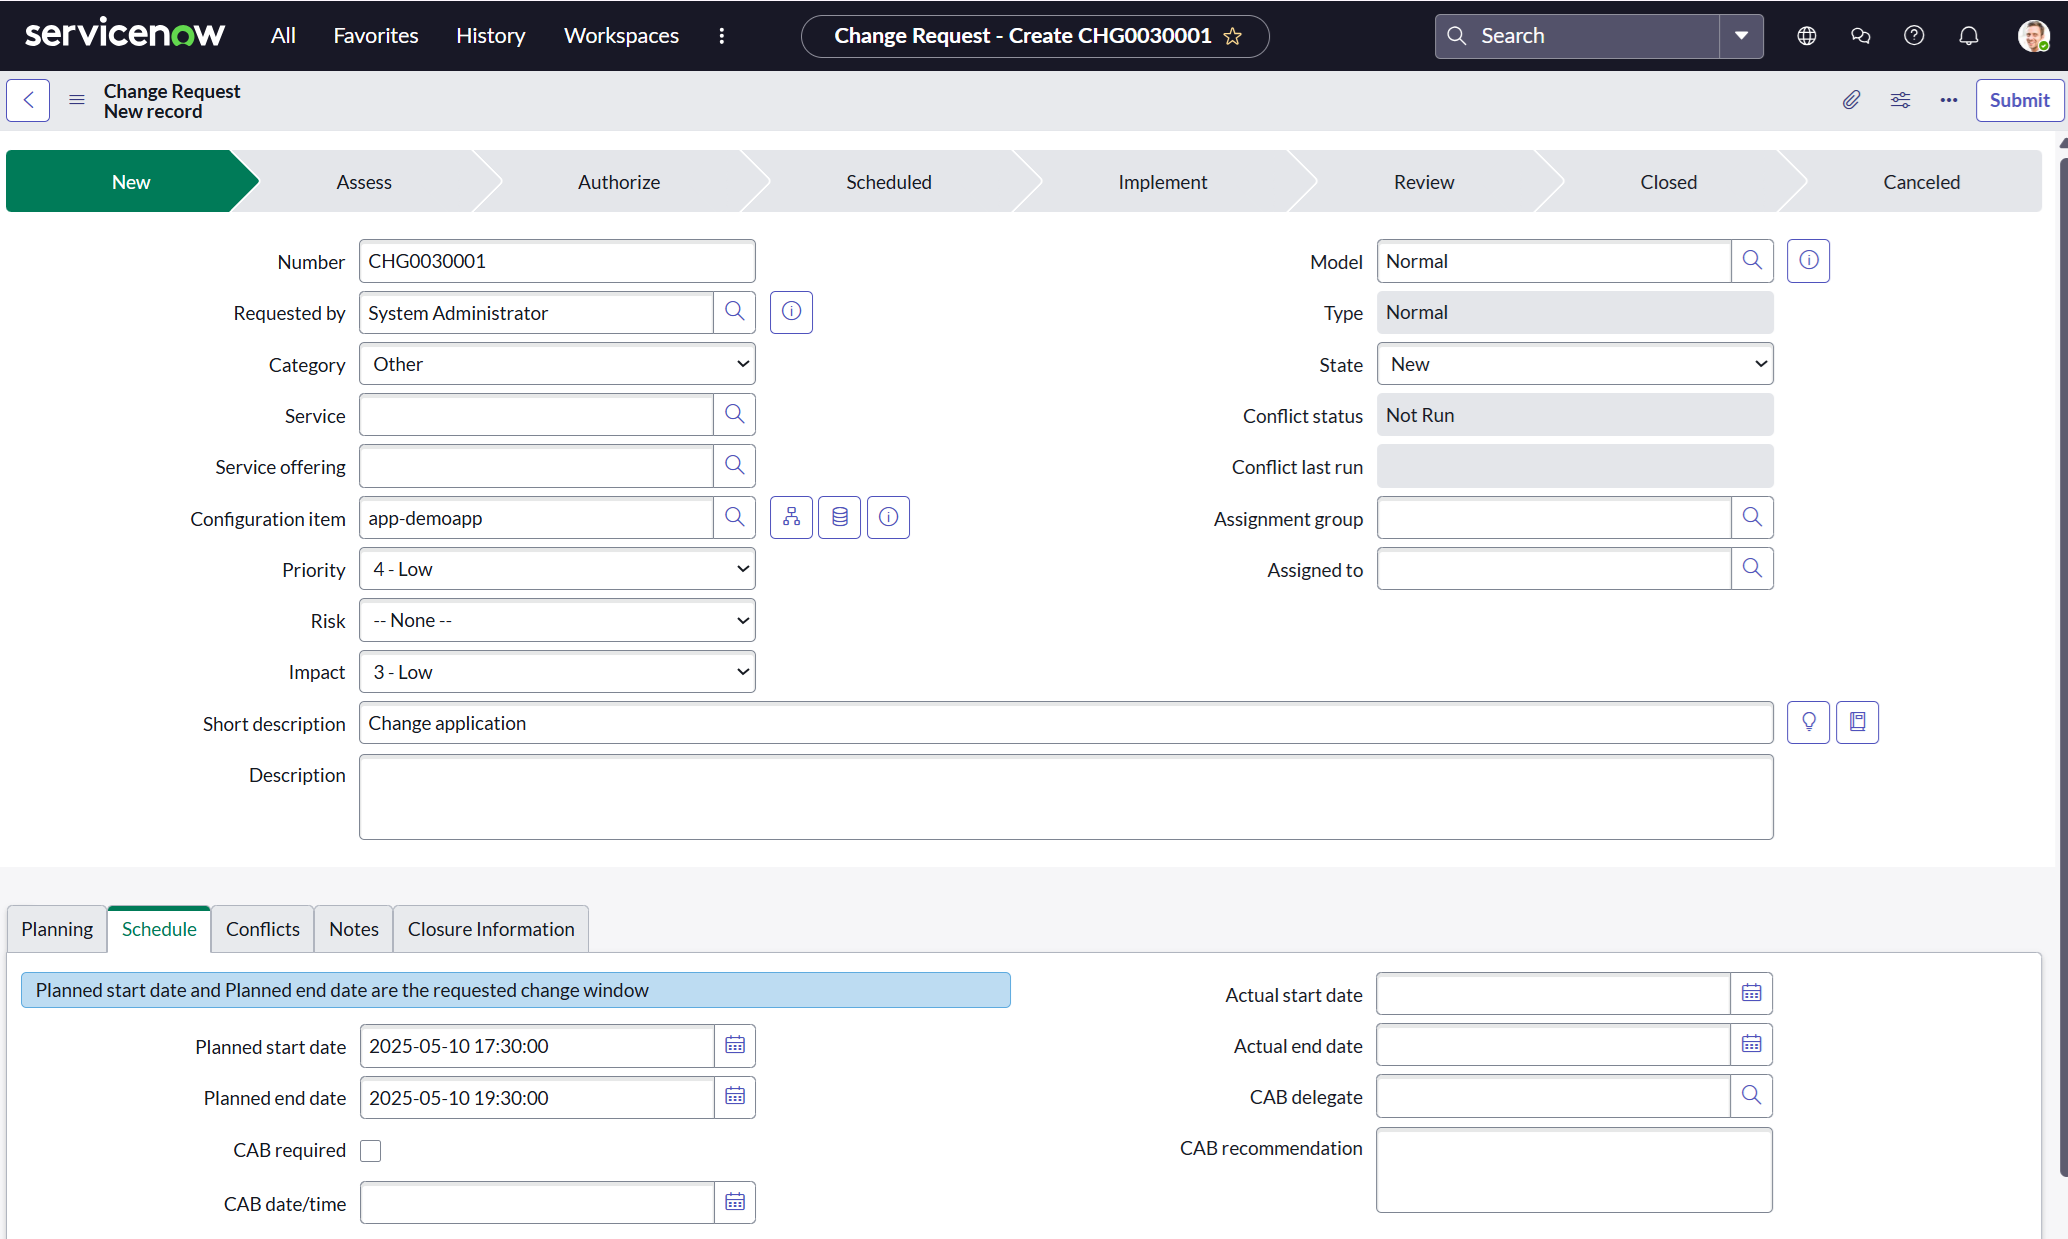
You can find your change in this list, when you follow along in a new developer environment this change will have the number CHG0030001.
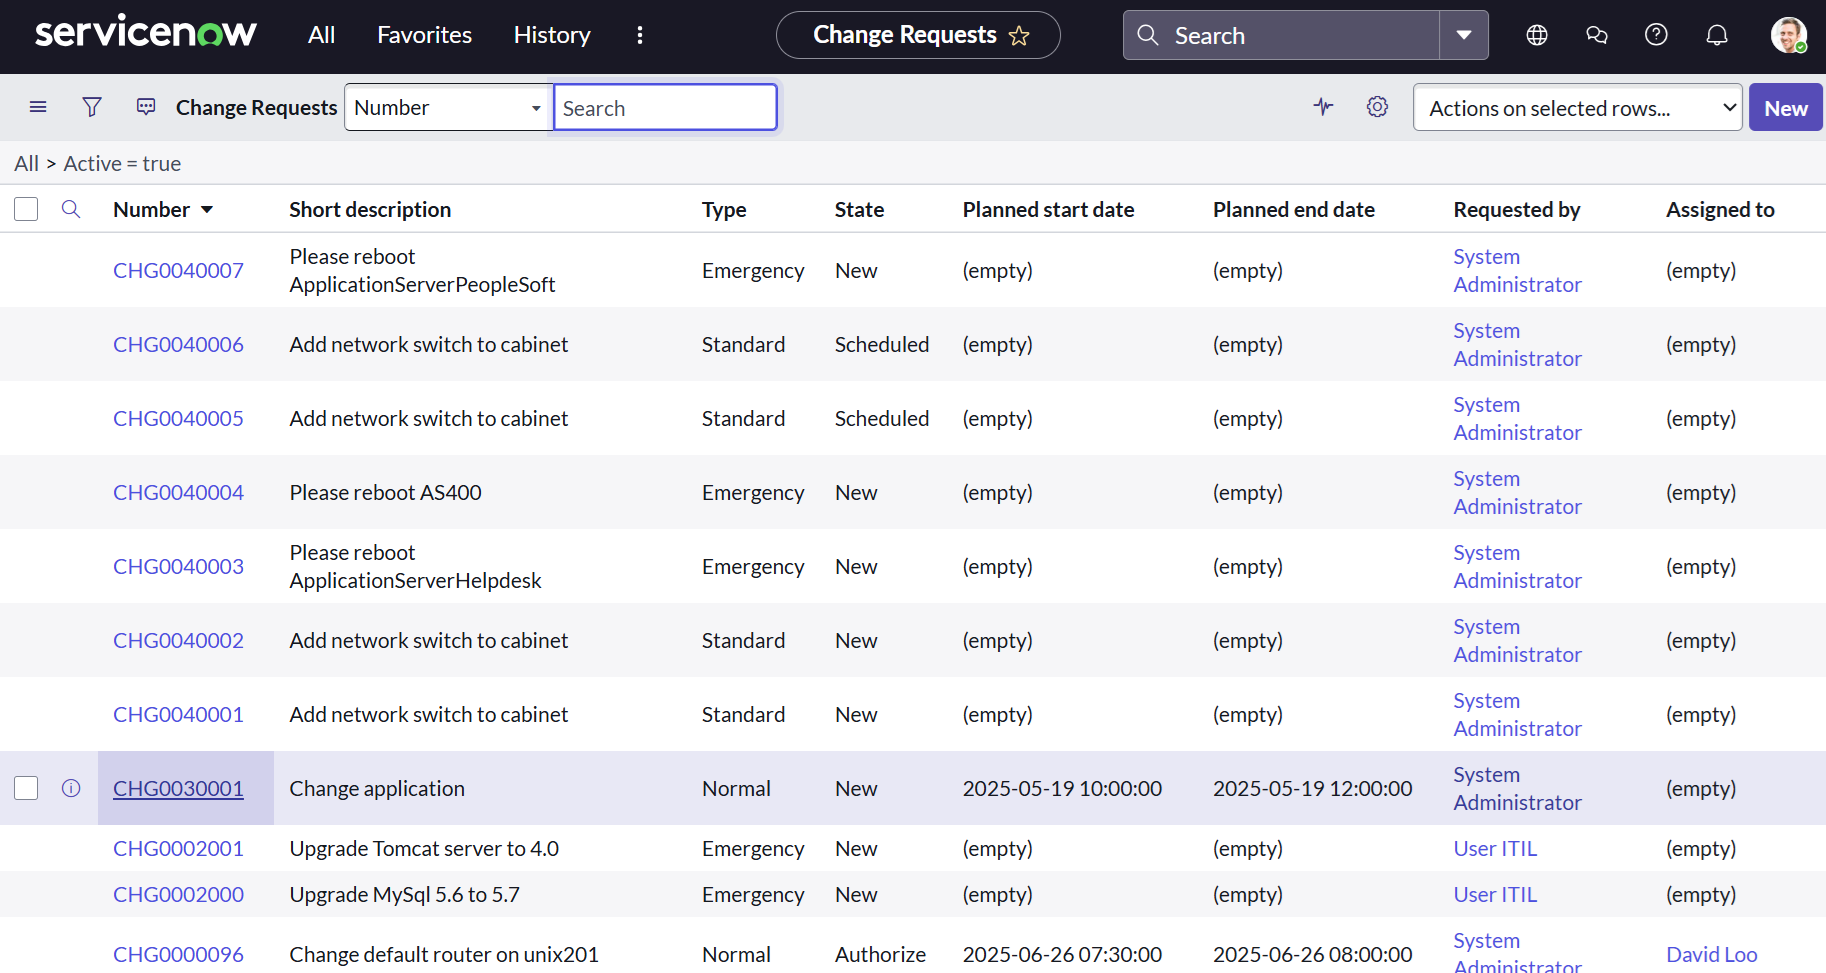
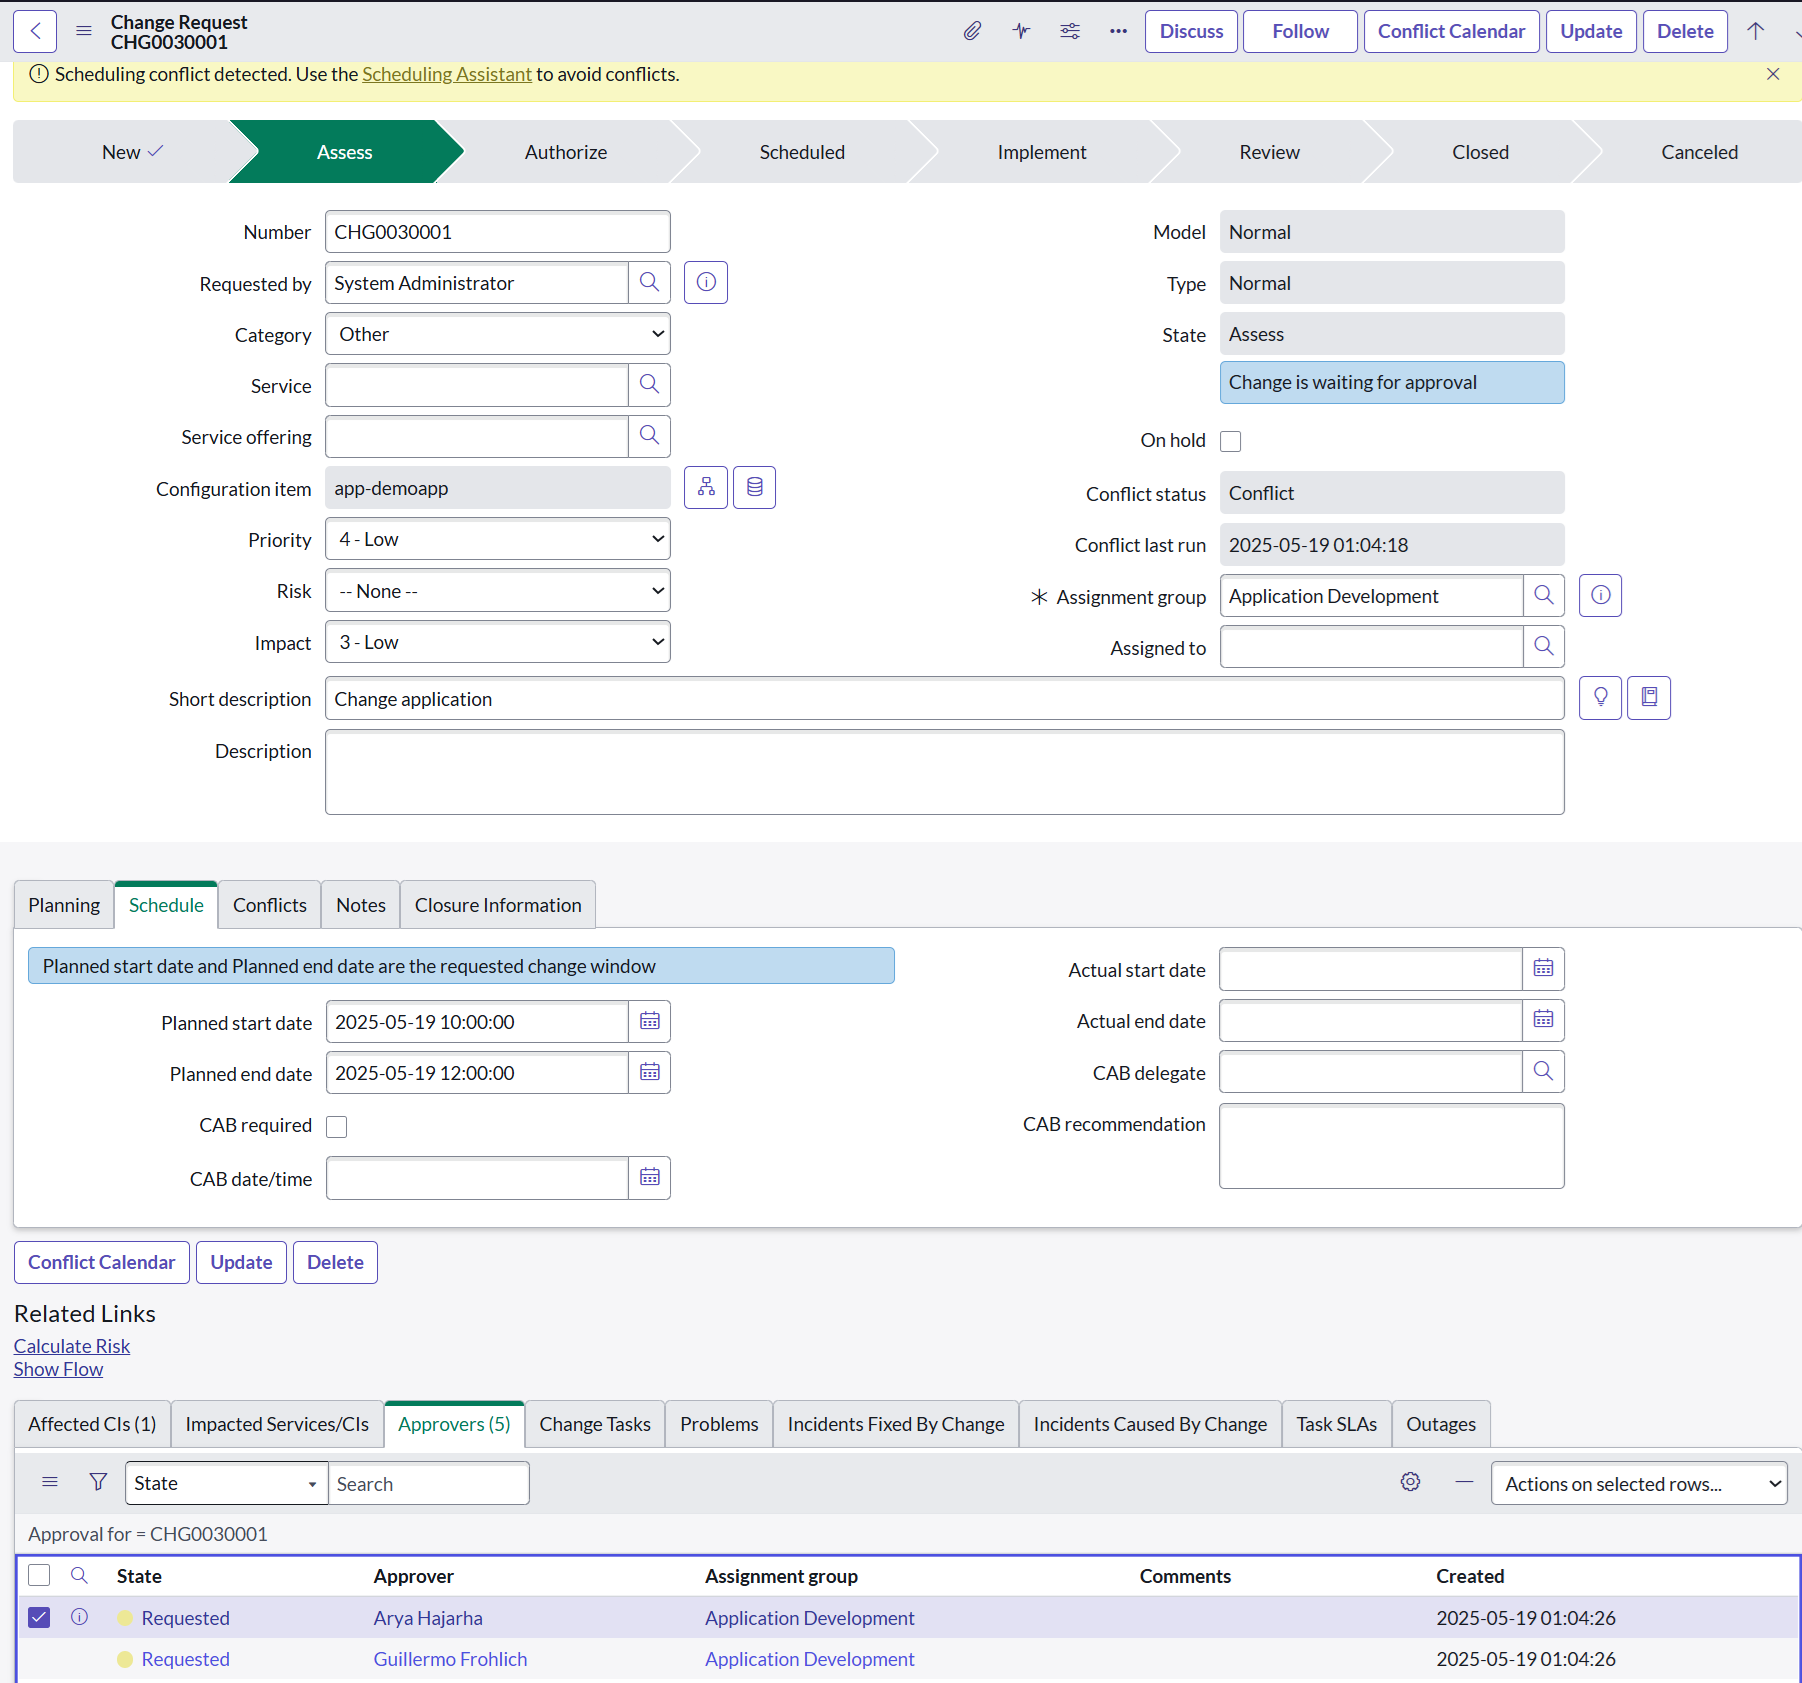
Open the change, and then change the State to Assess. Click on the magnifier glass next to Assignment Group to search for a group, for example Application Development. After that, click on the “Update” button on the top of the screen.
You will return to the list of changes, open the same change again. The change is now waiting for approval: select the “Approvers (5)” tab on the lower part of the screen and hover over the first name. Click on the check box on the left to let (in my case) Arya Hajarha approve your change.
Use the “Actions on selected rows” to approve the change.
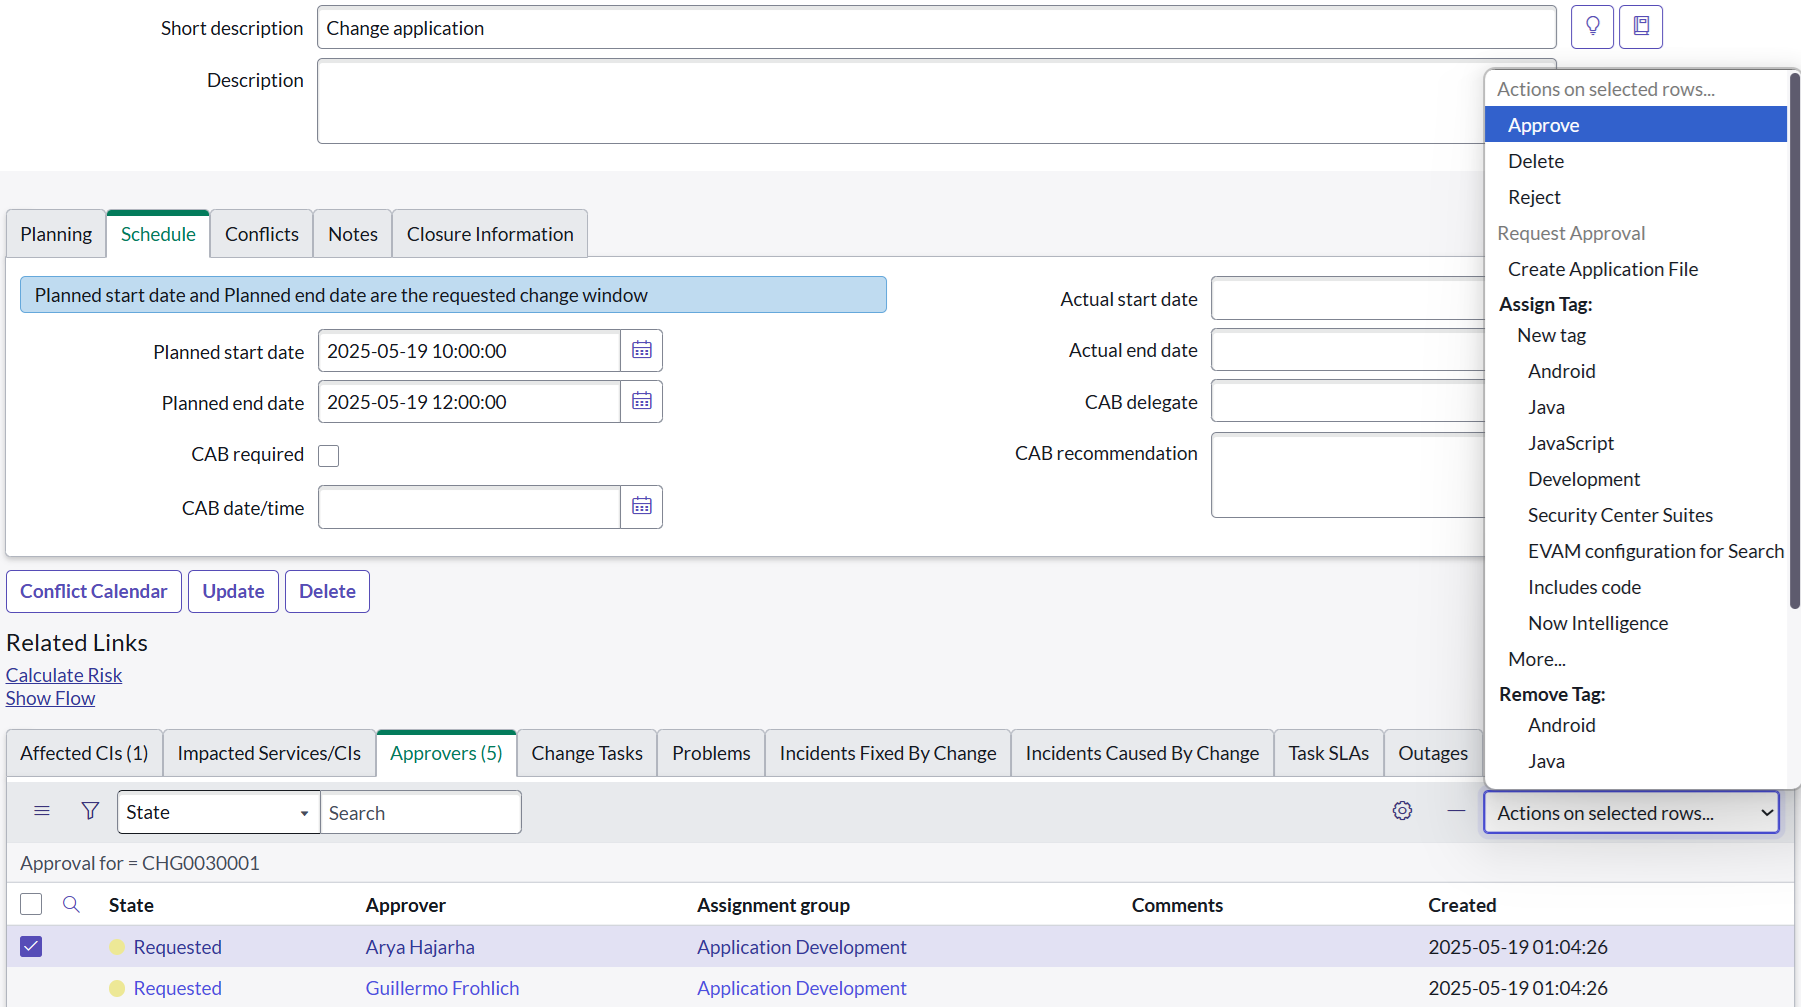
The state is changing to state Authorize, it now has to be approved by someone of the CAB Approval group. Follow the same procedure again to let the first member of the CAB Approval group to approve your change.
Now change the state from “Scheduled” to “Implement” and click in the top of the screen on Update. Now your change is in the correct state for the Ephemeral Access Controller Plugin to allow extra permissions.
Links
[1] Github repository ServiceNow Plugin:
https://github.com/argoproj-labs/argocd-ephemeral-access-plugin-servicenow
[2] Github repository Ephemeral Access Extension:
https://github.com/argoproj-labs/argocd-ephemeral-access
[3] Developer environment ServiceNow:
https://developer.servicenow.com/